Using Cloudflare to Customize Your Mastodon Username Domain
You can use Cloudflare to customize your Mastodon username domain without needing to host your own Mastodon.


The long decent of Twitter has accelerated very quickly; within weeks of Musk's takeover we've seen things go crazy fast. From clear mass-firing of employees who later turned out to be essential, to Musk changing rules when his feelings got hurt, to Twitter Blue going up in price to add a blue checkmark before being cancelled entirely.
If you're like me, you're looking for options to secure your network and your following before the ship sinks. I started using Mastodon way back in 2018, but at that point interest was low, and I couldn't get a good network going. I gave up and returned to Twitter.
This time, it feels like there's momentum, and so I was excited to give it another go. In the intervening time Mastodon has also gotten much more user-friendly and easy to use, and hosted instances you can join that match your style are easy to find and join.
One quirk of Mastodon is that because of federation your username isn't just @username, it's @username@instance. A downside of this is if you are [email protected], someone else could be [email protected]. In practice this isn't much of a concern, but, if you're someone who wants to own your own brand you might ask yourself why you can't be @[email protected].
The good news is, you can be!
You could host your own mastodon instance, of course, or an instance of a compatible platform that uses ActivityPub. toddsundsted/ktistec is a good choice for a single-user blog instance if you want to go that route. But if you do have an account on one of the larger instances, you can still make a more recognizable username to give to people.
Instructions for Cloudflare
For these instructions to work, you must have Cloudflare enabled for your domain, and you must have them proxying your DNS traffic for your website.

To set this up, you'll need to use the redirect rules settings within Cloudflare. 10 are available on the free plan. On the left side menu click Rules then Redirect Rules to set them up.

The discoverability protocol for ActivityPub (and thus Mastodon) uses calls to the following endpoint:
<domain>/.well-known/webfinger?resource=acct:<accountname>@<instance>
So for our example above for Spider-Man the call would be
http://mastodon.social/.well-known/webfinger?resource=acct:[email protected]
What's returned from these calls is a JSON with more details about the user and the instance as well as some instructions for well-behaved ActivityPub instances to connect. We don't need to care about that, because all we need to do is have .well-known/webfinger on our domain redirect to the correct URL on our instance.
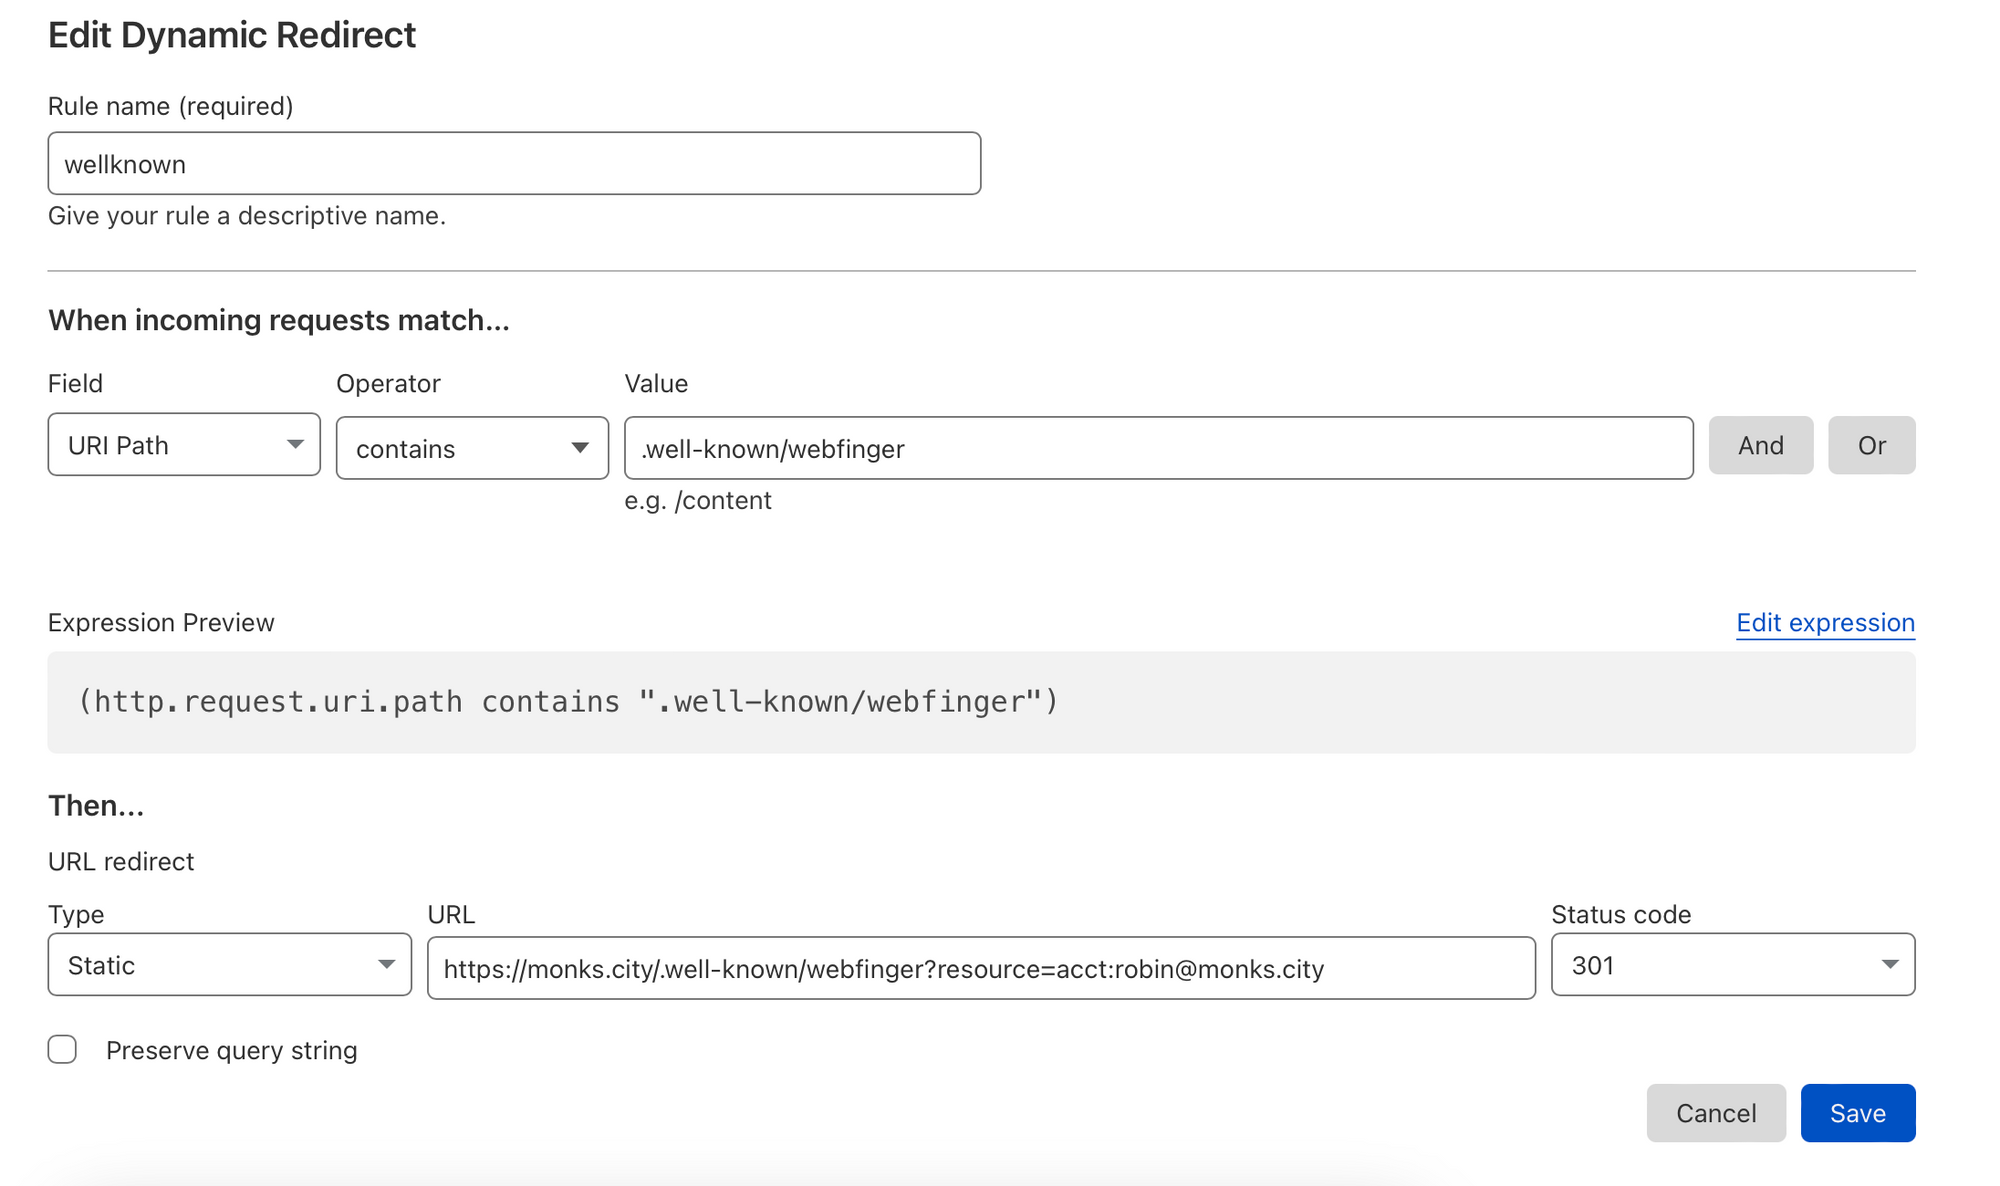
With that redirect rule created, you can now give out your domain as your instance username. Because any call to .well-known/webfinger is redirected to your hosted username, it works a bit like an email catch-all. In my case, I could give out @[email protected] or @[email protected] if I wanted to be wordy and both would equally work.
Verifying your domain
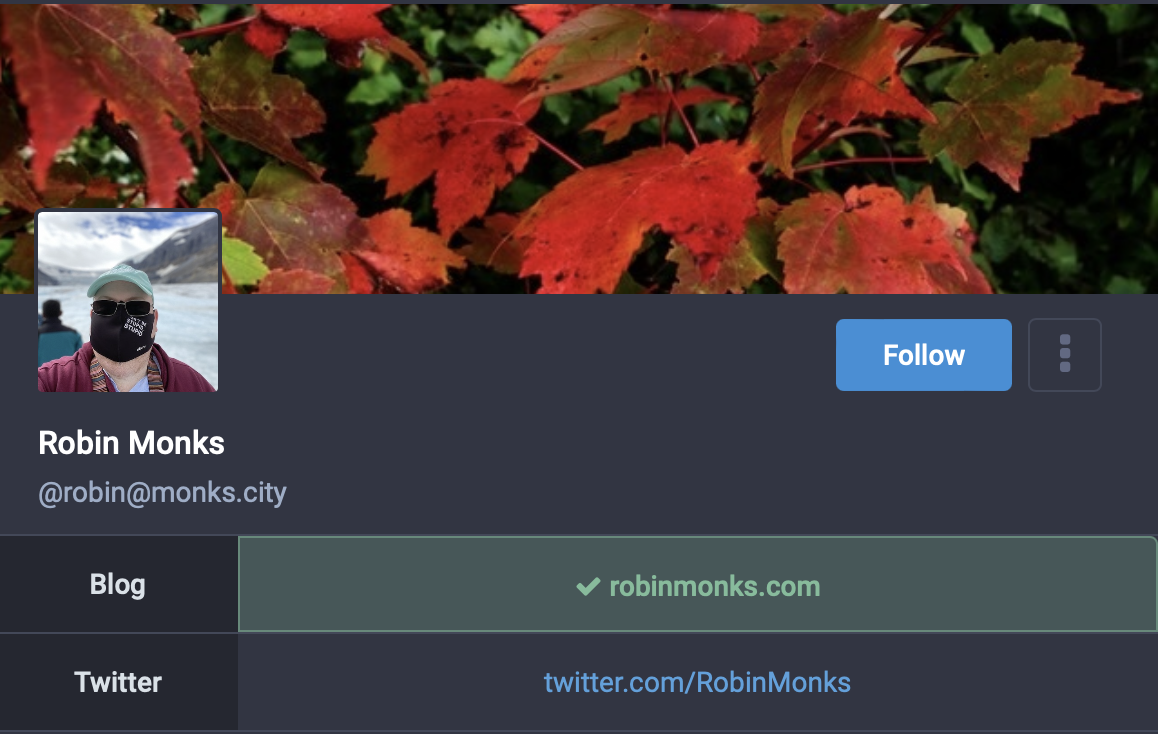
Once you've got your direct working, you should also verify your domain so once someone goes to your profile page on your hosted instance, they can see you are indeed the person they intended to follow.
Doing this in mastodon is easy. Edit your profile and scroll down to the metadata section. Add a key like "Website" or "Blog" or whatever strikes your fancy and then your domain as the value.
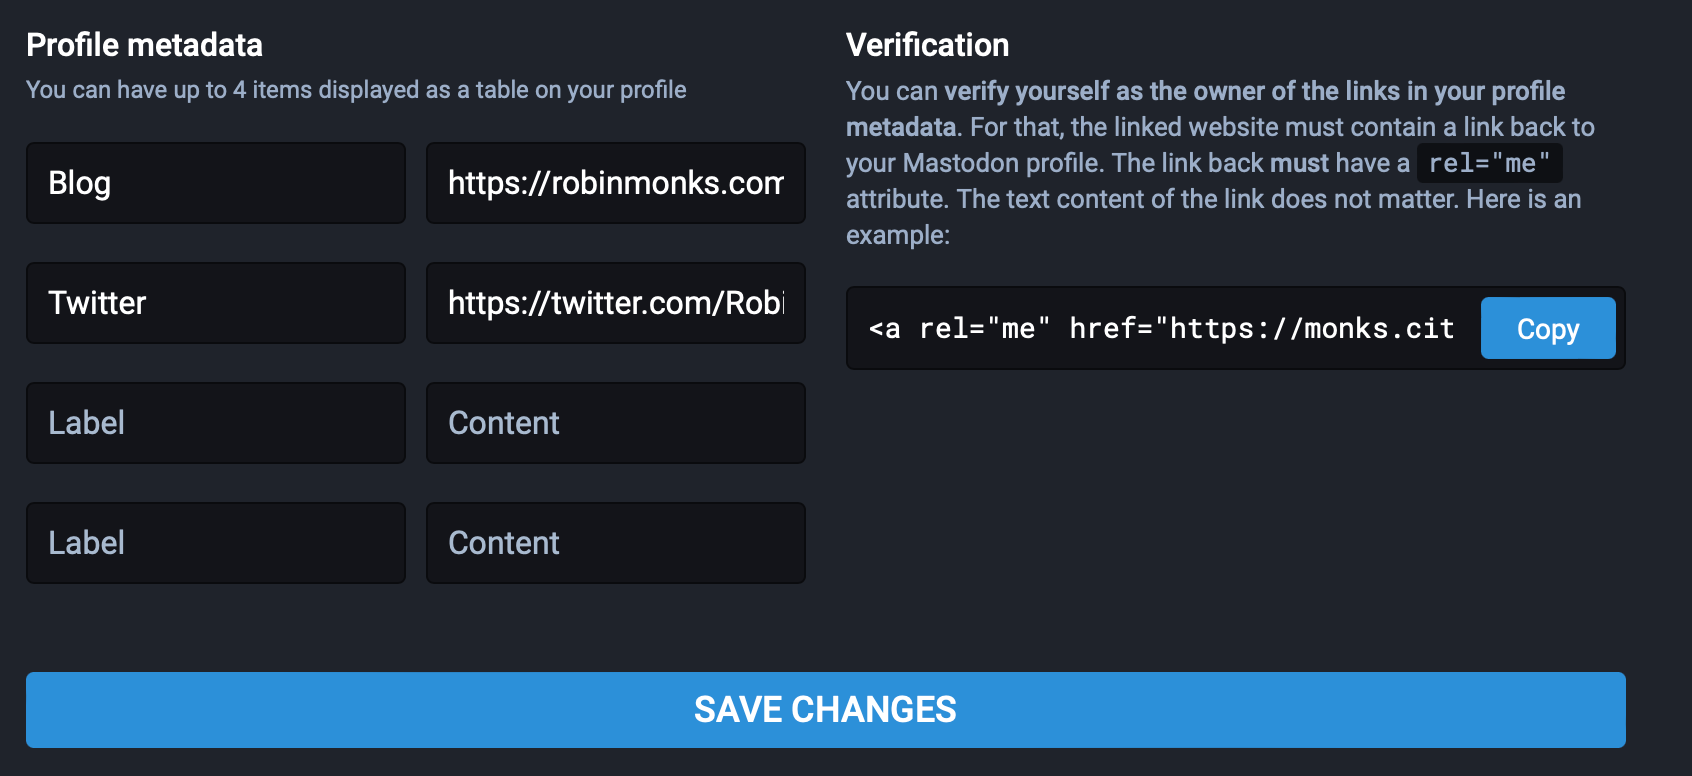
Mastodon will give an example of a URL to link back to verify your domain. The important elements are a link to an exact profile link and rel="me" which indicates the linked resource is another resource about you. Once you've added that link somewhere on your main domain (in my case it's in the footer), Mastodon will start showing it as validated within minutes.
Have fun in the feediverse, and don't forget to be awesome!
P.S. Also, once you're set up, follow me at @[email protected]!